
MC 103
Dental Ligature
An important safety measure that makes it possible to retrieve a clamp should it accidentally become dislodged and then inhaled or swallowed by the patient
A dental dam stabilizing cord can be a simple piece of dental floss or dental tape.
Ligature placed on the bow of the clamp for protective purposes.
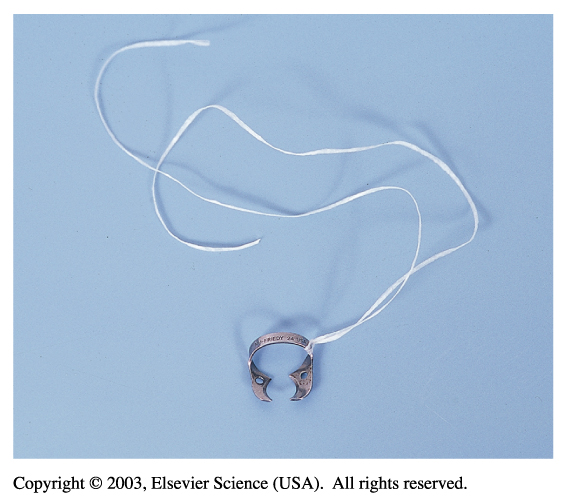
The slide shows an example of ligation of the dental dam clamp.
Always cut a piece long enough to be grabbed quickly if needed.
Tie the other end of the ligature to the frame of the dental dam to ensure that you can easily find the end.
Dental Dam Application
- Steps in preparation and placement
- Dental dam equipment and supplies readied
- Area of mouth examined for placement
- Dam punched
- Clamp selected, ligated, and positioned
on forceps - Clamp placed
- Dam placed
- Frame placed
- Dam secured and inverted
Applications
Maxillary arch application: Punch the holes 1 inch down from the upper edge of the dam.
Mandibular arch application: Punch the holes 2 inches from the edge.
Curve of the arch: It may be necessary to make adjustments to accommodate an extremely narrow or wide arch.
Use the one-step or two-step method to place the dam. The main difference in the methods is the sequencing in the placement of the clamp and dental dam.
Dental Dam Removal
- Steps in removal
- Remove any ligatures that are stabilizing the dam.
- Using crown-and-bridge scissors, cut each hole, creating one slit.
- Position the forceps in the clamp.
- Remove the dam and frame as a unit.
- Evaluate the patient.
- Evaluate the dam.
Why is it important to evaluate the dental material after its removal? (Fragments of the dental dam left behind under the gingiva can cause gingival irritation.)